Introduction
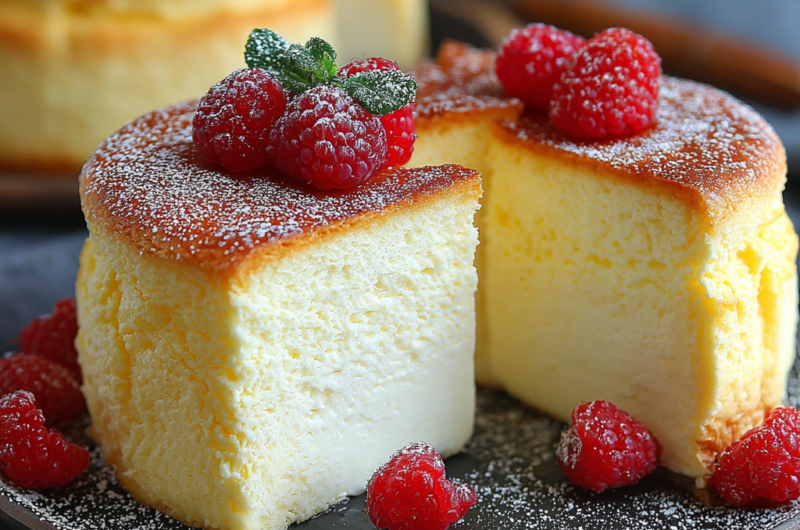
Japanese cheesecake, known for its light and airy texture, is a delightful fusion of cheesecake and soufflé. Unlike traditional cheesecakes, it offers a unique balance of sweetness and a subtle creaminess, making it an ever-popular treat both in Japan and beyond.
This cheesecake is a perfect dessert for those who find traditional cheesecakes a bit too heavy. With its fluffy body and melt-in-the-mouth consistency, it’s an impressive treat for gatherings or just a cozy evening at home. The beauty lies in its simplicity, making it a suitable challenge for home cooks.
Ingredients
- 250g cream cheese
Cream cheese provides the rich and creamy base that is essential for the cheesecake's flavor. It is crucial to use room-temperature cream cheese to ensure a smooth batter. - 50g unsalted butter
Butter adds to the overall creaminess and richness of the cheesecake. It helps create a moist texture that is vital for achieving the perfect delicate crumb. - 70g granulated sugar
Sugar sweetens the cheesecake while also contributing to the overall texture. It helps caramelize slightly during baking, enhancing the flavor. - 3 large eggs
Eggs act as the binding agent in the batter, giving structure to the cheesecake. They also contribute to the fluffiness once whipped properly. - 30g all-purpose flour
Flour provides a subtle structure to the cheesecake while allowing it to remain light and airy. It's key to whisk it gently to avoid a dense texture. - 30g milk
Milk adds moisture to the batter which is essential for the right creamy consistency. It helps to meld the flavors together seamlessly. - 1 tsp vanilla extract
Vanilla enhances the flavor profile of the cheesecake, introducing a warm and inviting aroma that pairs beautifully with the rich ingredients.
Directions & Preparation
Step 1: Preheat the oven to 160°C (320°F).
Preheating the oven is essential to ensure even baking. A properly heated oven helps create the right environment for the cheesecake to rise without collapsing. This initial step lays the groundwork for a successful bake.
Step 2: Prepare the baking pan by lining it with parchment paper.
Lining the pan prevents the cheesecake from sticking and makes for an easier removal once cooled. This also helps maintain the shape of the cheesecake during the cooling process.
Step 3: Beat cream cheese and butter until smooth.
Using an electric mixer, blend the cream cheese and butter together thoroughly. This step is crucial because a well-combined mixture leads to a creamy texture and prevents lumps in the finished cheesecake.
Step 4: Add sugar gradually and mix until incorporated.
Gradually adding sugar helps to prevent clumping and ensures that it is evenly distributed in the batter. This technique enhances the sweetness evenly throughout the cheesecake.
Step 5: Incorporate eggs one at a time, beating well after each addition.
Separately adding the eggs allows for better aeration in the batter. This leads to a soufflé-like quality in the final product, ensuring a light and fluffy cheesecake.
Step 6: Sift the flour into the mixture and blend until combined.
Sifting the flour helps remove any lumps and ensures even distribution throughout the batter. Mixing it gently is key to maintaining the airiness created by the whipped eggs.
Step 7: Stir in the milk and vanilla extract.
The addition of milk contributes to a smoother batter, while vanilla enhances the flavor profile. This is the final blending step, so aim for a homogeneous mixture without overmixing.
Step 8: Pour the batter into the prepared pan and smooth the top.
Pouring the batter gently into the lined pan ensures that air bubbles don’t form at the surface. A smooth top gives the cheesecake a professional appearance, important for aesthetics when serving.
Step 9: Bake in the preheated oven for 45-50 minutes.
Baking slowly at a controlled temperature allows the cheesecake to rise gradually and set without cracking. Keep an eye on the baking process; the cheesecake should slightly jiggle in the center when done.
Step 10: Turn off the oven and let the cheesecake cool inside for an hour.
Allowing the cheesecake to cool in the oven prevents it from experiencing a sudden change in temperature, which can cause cracks. This step is crucial for maintaining the integrity of its structure.
Step 11: Remove from the oven and chill in the refrigerator for at least 4 hours before serving.
Chilling solidifies the cheesecake, allowing it to set perfectly. This waiting time lets the flavors develop, resulting in a more enjoyable experience when served.

The Science of Fluffiness
The signature fluffy texture of Japanese cheesecake is achieved through the careful aeration of the batter, primarily due to the beaten eggs. When eggs are whipped, they trap air, creating a lightness that is crucial for the final bake. Additionally, the gentle folding of flour into the batter retains this air, ensuring a soft and soufflé-like consistency that makes each bite melt in your mouth.
Choosing the Right Ingredients
The quality of ingredients plays a significant role in the outcome of Japanese cheesecake. Opting for full-fat cream cheese provides the necessary richness, while fresh eggs add optimal moisture and fluffiness. Unsalted butter allows you to control the saltiness of the batter, enhancing the flavors without overwhelming sweetness. Selecting high-quality ingredients will elevate your cheesecake to restaurant-worthy standards.
Serving Suggestions
Japanese cheesecake can be enjoyed on its own or with a variety of toppings. Lightly dusting the surface with powdered sugar adds a touch of sweetness without overpowering the flavor. Fresh fruits like strawberries or a drizzle of honey pairs beautifully, complementing the creaminess of the cheesecake. For a twist, consider serving with a dollop of whipped cream infused with a hint of vanilla, enhancing both texture and taste.
FAQs
What can I do if my cheesecake turned out too dense?
If your cheesecake is dense, it may be due to overmixing the batter or under-whipping the egg whites. Ensure you fold in the flour gently and incorporate enough air into the eggs.
Can I reduce the sugar in the recipe?
You can reduce the sugar, but be cautious as it may affect the texture and moisture of the cheesecake. A slight reduction will work, but don't go below a quarter of the amount to maintain balance.
Why did my cheesecake crack on top?
Cracking can occur if the batter was overmixed, or the cheesecake was baked at too high a temperature. Also, ensure you allow it to cool gradually to prevent sudden temperature changes.
Can I use a different type of cheese for this recipe?
While cream cheese is ideal for texture and flavor, mascarpone or ricotta could be used for a different flavor, though adjustments might be necessary.
What if I don’t have a springform pan?
If you don't have a springform pan, you can use a regular round cake pan; just make sure to line it well with parchment to facilitate easy removal after baking.
Is it important to let the cheesecake cool in the oven?
Yes, cooling in the oven allows for a gradual temperature drop, preventing cracks and ensuring a smooth top finish. This is a key step for a perfect Japanese cheesecake.
Conclusion
Japanese cheesecake is a unique and delightful dessert that combines simplicity with elegance. With the right ingredients and techniques, it can be mastered at home, offering an impressive dish that is sure to please friends and family alike.
The joy of crafting this fluffy cheesecake lies in the celebration of textures and flavors. Don’t shy away from the challenge; with practice, you’ll perfect a recipe that is truly a labor of love.
Recipe Card

Mastering the Art of Japanese Cheesecake at Home
Ingredients
Method
- Preheat the oven to 160°C (320°F).
- Prepare the baking pan by lining it with parchment paper.
- Beat cream cheese and butter until smooth.
- Add sugar gradually and mix until incorporated.
- Incorporate eggs one at a time, beating well after each addition.
- Sift the flour into the mixture and blend until combined.
- Stir in the milk and vanilla extract.
- Pour the batter into the prepared pan and smooth the top.
- Bake in the preheated oven for 45-50 minutes.
- Turn off the oven and let the cheesecake cool inside for an hour.
- Remove from the oven and chill in the refrigerator for at least 4 hours before serving.
Notes
Additional serving suggestions: pair with a crisp salad, garlic bread, or roasted seasonal vegetables for balance.
For make-ahead, prep components separately and assemble just before heating to preserve texture.
Taste and adjust with acid (lemon/vinegar) and salt right at the end to wake up flavors.